
Because Splunk is so valuable in analyzing data, it is no surprise that many people want as much data as possible to be ingested. This can cause some searches or reports that may need to be run often to run very slowly. Logs can be lengthy and complex with many fields that may not be relevant to your search, but are critical for other ones so they cannot be cut off.
One way to help your searches looking at a narrow portion of data is through what is called summary indexing.
What is summary indexing?
Summary indexing is when an index is created with a summary of the data needed for a search or report rather than the whole log. To accomplish this there is a very handy SPL command: the collect command.
What is the Splunk Collect Command?
With the collect command, any data pulled from a search can be sent to another index. Luckily using it is a breeze: just pipe | collect index=”your index here” onto the end of your search.
How to Use the Splunk Collect Command
It is important to note there are more than a few optional arguments to make the collect command more valuable. Some of the most useful arguments are as follows:
- addtime: this argument specifies if a time field is added to each event or not; it defaults to yes
- host: this argument allows you to specify the host field to help further normalize your data
- source: much like host, this argument allows you to specify a source to help with data differentiation
- sourcetype: like both host and source but it is important to note that by default the sourcetype is “stash.” If this is changed the summary data that is being ingested will hit against your license usage
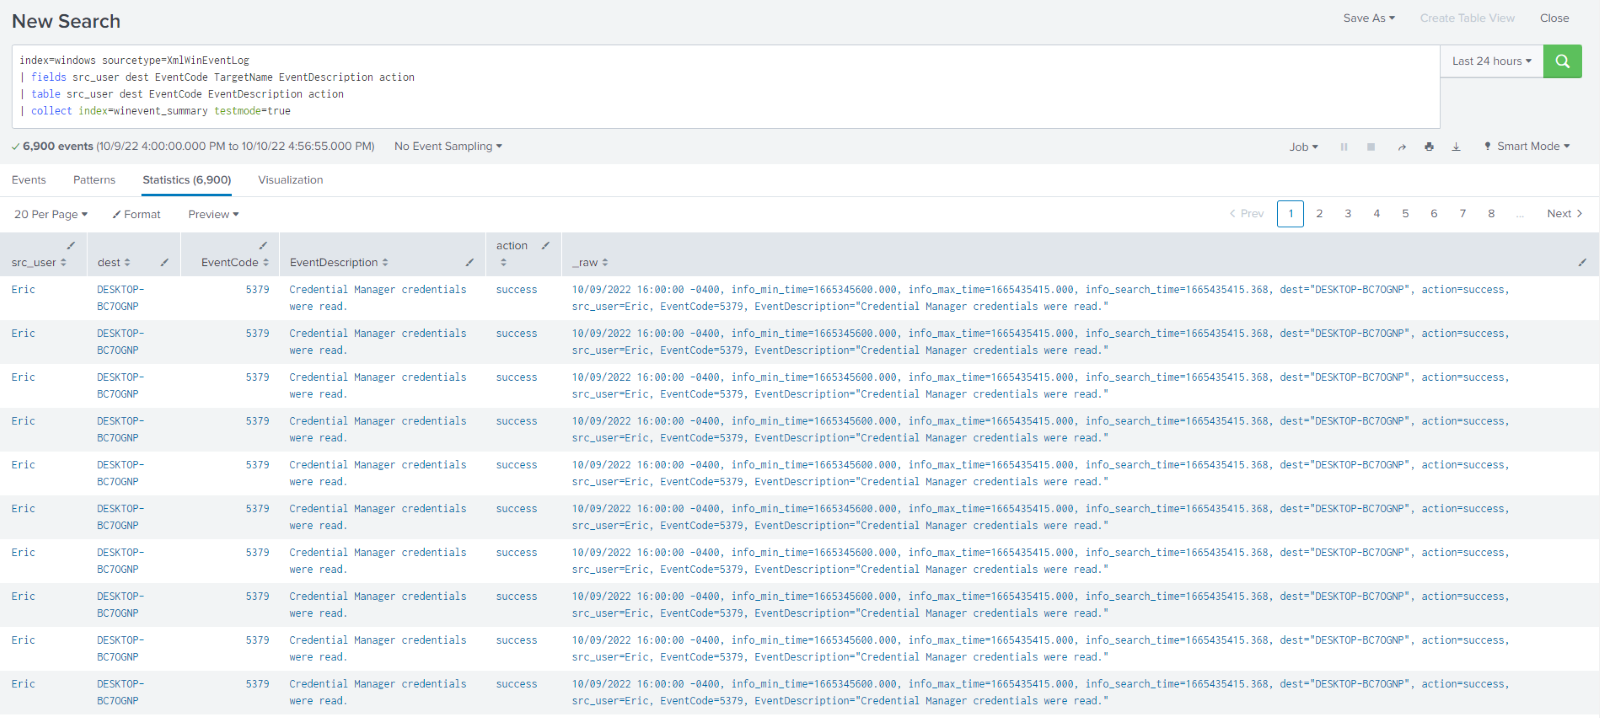
- testmode: defaults to false. If set to true it shows what the raw events will look like in your table
Splunk Collect Command Examples and Use Cases
The collect command is great for pulling out only the data you need to a new index to make searches for that data much more efficient.
IMPORTANT NOTE: The summary index you are sending data to MUST be created first. There is no different method for creating the index, choose whichever is easiest for you (UI or CLI).
Example 1:
Say I had Windows event log data and a lot of it. There are a total of 92 unique fields in my wineventlog data, but I only need 6 of them in my report my manager wants me to run daily. Searching through the data as it is there are many extra fields being extracted, I do not need and taking up precious time and resources. I can simply use the fields command to pull out the fields I need and the table command to lay them out in an ordered way.

To send this data to a summary index I simply add | collect index=winevent_summary. With winevent_summary being the name of the summary index I created beforehand. Running this command returns a screen that looks identical to before.
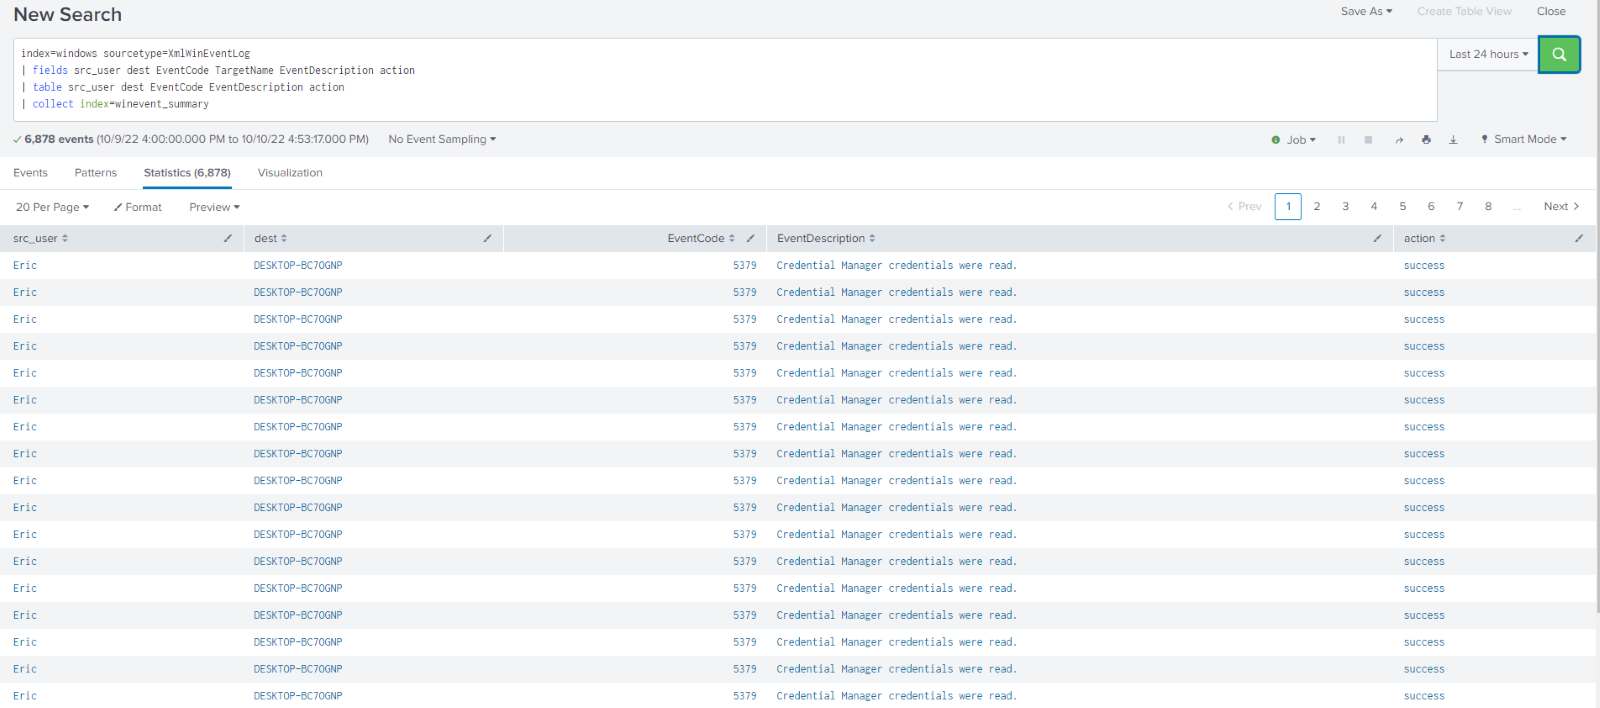
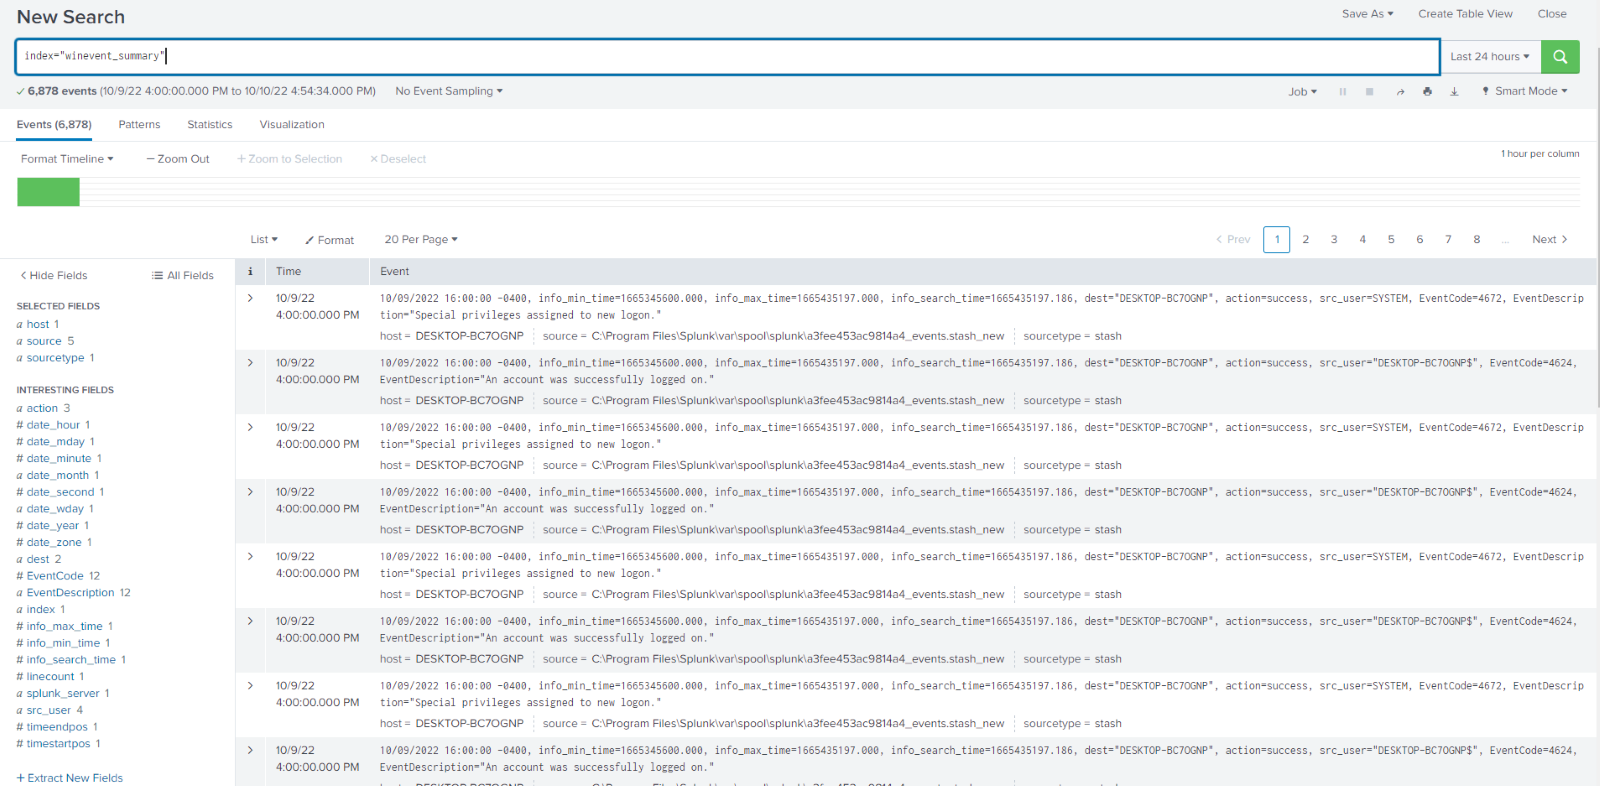
However, if I search index=winevent_summary I can see my newly created index filled with the data I collected, without all the extra fields being extracted and taking up resources. I am now free to run my scheduled search or report on this data and it will be much more performant.
Example 2:
Running the same search but adding testmode=true you can see the raw event has been added a new column in the table command, allowing you to preview what it will look like in your index so you can troubleshoot any potential issues.
Searches with the collect command like this are often run as scheduled searches to build out a summary index which can then, in turn, have search run against it improving efficiency and decreasing resource usage for former costly searches or reports.
If you found this helpful…
You don’t have to master Splunk by yourself in order to get the most value out of it. Small, day-to-day optimizations of your environment can make all the difference in how you understand and use the data in your Splunk environment to manage all the work on your plate.
Cue Atlas Assessment: Instantly see where your Splunk environment is excelling and opportunities for improvement. From download to results, the whole process takes less than 30 minutes using the button below: