
What is Splunk DB Connect?
Splunk DB Connect is a Splunk App that enables easy integration of Splunk with relational databases. By Integrating Splunk with structured data from traditional relational databases, we can do deeper analysis and operational intelligence.
We can import tables, views, rows, and columns from a database directly into Splunk Enterprise. DB Connect pulls this data in streams or batches. Splunk indexes this data into an index and provides users a way to analyze and visualize that data along with your existing Splunk Enterprise data. Machine data from Splunk Enterprise can also be exported to relational databases using DB Connect. DB Connect also does enrichment by performing database lookups, which lets you reference fields in an external database with fields in your event data.
A very useful feature in DB Connect is to preview data and validate settings before ingesting into Splunk. To prevent accidental duplication Splunk creates a checksum and stores it in a file. When importing data DB Connect checks this checksum and only pulls new data.
How To Install DB Connect
Splunk DB Connect can be downloaded and installed from Splunkbase. Splunk DB Connect is compatible with most relational databases including Microsoft SQL Server, Oracle Database, IBM DB2, Teradata, SAP Sybase, PostgreSQL, MySQL.
DB Connect can be deployed in a single instance or search heads in distributed deployment. In this post we will discuss installing DB Connect on a Splunk Enterprise instance.
Step 1: Install Splunk DB Connect App
Login to Splunk and navigate to Apps > Manage Apps > Install app from file > Choose File > Upload
Once the App is uploaded, restart Splunk. Now Splunk DB Connect App is successfully installed.
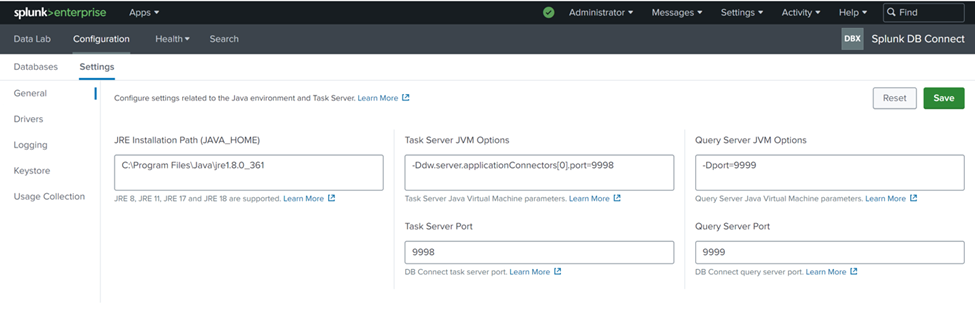
Step 2: Configure JAVA_HOME and Install JDBC driver
Once the App is successfully installed, now it’s time to configure JAVA_HOME. In JRE installation path (JAVA_HOME) section enter correct path and click save. This restarts Task Server. If you see a problem with task server timing out, restart Splunkd.
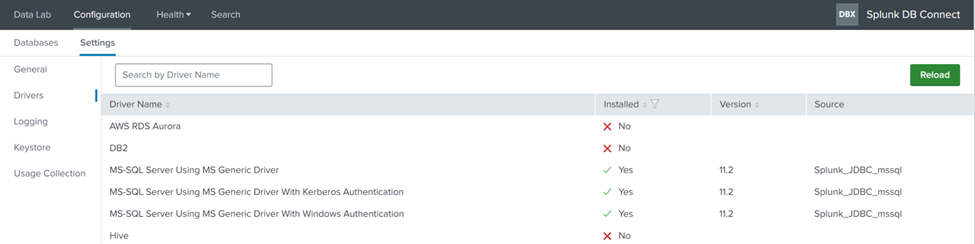
Now, install JDBC driver for the database you are planning to pull data from. To make it easy Splunk pre-packaged all major database drivers into an add-on. In Splunkbase you can find JDBC driver add-ons for Microsoft SQL server, Oracle, MySQL, Postgres, DB2 etc.
Once JDBC driver is installed, Installed column in Configuration > Settings > Drivers section displays green checkmark icon and the word “Yes” as shown below.
Step 3: Create identity
Next step is to create an identity. An identity contains database credentials. DB Connect uses this credential to access database. Navigate to Configuration Databases Identities.
Splunk provides three options to create an identity.
- Basic Identity
- CyberArk Identity
- HashiCorp Identity
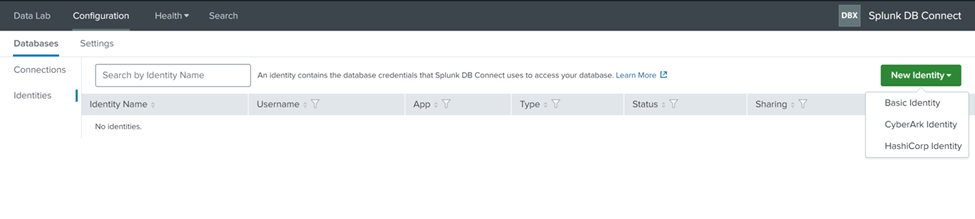
Basic Identity
In New Identity select Basic Identity. Enter Identity name, Username and password. Password is encrypted after this identity is saved. If you are connecting to an MS SQL server, you can select “Use Windows Authentication Domain” checkbox then enter Domain information or keep “Use Windows Authentication Domain” checkbox unchecked and click save.
CyberArk Identity
In New Identity select CyberArk Identity. Enter all the information and click save.
HashiCorp Identity
In New Identity select HashiCorp Identity. Enter all the information and click save.
Step 4: Create Database Connection
Next step is to create a database connection. Navigate to Configuration > Databases > Connections and click new connection.
On the New Connections page, complete following fields
- Connection Name: give it a name
- Identity: choose the identity that was created in previous section
- Connection Type: select type of database you’re connecting to from dropdown
- Timezone: Timezone used to read time related fields
- Host: hostname of database
- Port: port number of the database
- Default Database: Default database or catalog name for the database type you chose
- Fetch Size: enter number of rows to return at a time from database (optional setting)
SSL can also be enabled if you would like. However, SSL support is not available for all connection types.
Step 5: Create Database inputs
Next step is to create a database input. Database input lets us retrieve and index data into Splunk from a database. Navigate to DataLab Inputs and click New Input.
In Set SQL Query page, select connection that was created in previous section from the dropdown. Then select catalog, schema and table that contain the data you want to pull into Splunk.
After selecting table, Splunk displays the corresponding SQL query in SQL editor. If you want to write your own SQL query you can do so as well. Once your SQL query is finalized click Execute SQL to preview results.
Under settings, select Input Mode, Input Type, Timestamp and Query Timeout (Optional). Input type has two options to choose from.
- Batch Input
- Rising Input
Each has its own use cases. Batch input queries the same database each time you run the input and returns all results. Whereas Rising input has a column that DB Connect uses to keep track of what rows are new from one execution to the next.
Once everything looks good click Next which brings us to Set Properties page. Enter all the necessary information on this page and click save.
Now we created a Database input from scratch. If everything is good, you will start seeing data flowing into Splunk.
If you ever want to update checkpoint value or reingest data for a particular database input checkout tail_rising_column_checkpoint_value setting in inputs.conf or $SPLUNK_HOME/var/lib/splunk/modinputs/server/splunk_app_db_connect location.
Output Data to Database from DB Connect:
Splunk DB Connect can also output data from Splunk to a database on a recurring basis. Navigate to DataLab > Outputs and click New Output.
In Set Up Search page, Splunk provides two options:
- Run ad-hoc search
- Select a saved search
Select appropriate option and click next. In the next page you choose the table from database where Splunk event data is exported to. Fill in all the details and click next. In Field Mapping page we map Splunk data fields to database columns. Click next and we land in Set properties page. Here we enter information like Application Name, Query Timeout, batch size and scheduling. Enter all the relevant information and click save.
Once everything is configured correctly, data will start flowing from Splunk to database. Data enrichment can also be done using lookups.
Conclusion
Splunk DB Connect is a powerful tool that integrates Splunk and relational databases. It lets us pull data from a database to Splunk and output data from Splunk to database. Install Splunk DB Connect App in your organization and explore its capabilities.
If you found this helpful…
You don’t have to master Splunk by yourself in order to get the most value out of it. Small, day-to-day optimizations of your environment can make all the difference in how you understand and use the data in your Splunk environment to manage all the work on your plate.
Cue Atlas Assessment: Instantly see where your Splunk environment is excelling and opportunities for improvement. From download to results, the whole process takes less than 30 minutes using the button below:


